

How To Add Border To Image In Gimp
Whether you're looking for a seasonal flourish or a simple and elegant outline, there are lots of ways you can make a edge in GIMP. Similar almost artistic projects, the method will depend on exactly what result you want, then in this tutorial, I'll cover a few of the all-time ways to make a border in GIMP.
Method 1: Making Borders with a Filter
This is by far the simplest method, and so it simply has a few basic options for customizing the results. With your prototype loaded in GIMP, open the Filter menu, select the Decor submenu, and click Border.

As you would await, GIMP will open up a dialog box to let you specify a few options. You'll have to set the same border size for the top and lesser of the epitome, besides as one size for the left and right, instead of assigning the size of each border edge individually.

After size, you'll demand to set the Delta value on color option. I don't know why GIMP insists on making things disruptive for users, but what this setting does is allow you to create a 'raised' issue by altering the colors of the border to add the suggestion of a light source.
To illustrate the deviation, here'south the case image with the Delta value on colour option prepare to 0 and the Border color set up to blackness:
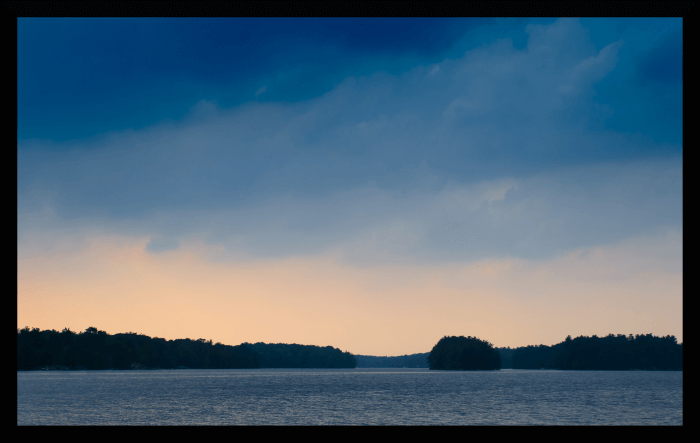
If you lot change the Delta value on color option to 255, you'll get a very different upshot, equally shown below:

You can also create more interesting effects by combining various sparse borders into a larger one past repeating the Add Border script a few times with different settings.
Method two: Make a Edge Manually with Transforms
This method isn't quite every bit simple every bit the showtime i, but it's close! You'll accept to do a bit of bones math, simply I'g certain you're up for information technology.

With your image loaded in GIMP, open the Image menu and select Sheet Size. GIMP will open up the Ready Image Sheet Size dialog box, which volition let you lot create the extra room you need to put a border around your image.
You'll have to do a little bit of math to calculate the new dimensions of your epitome, but you tin can always come up back and adapt it later if something goes incorrect.
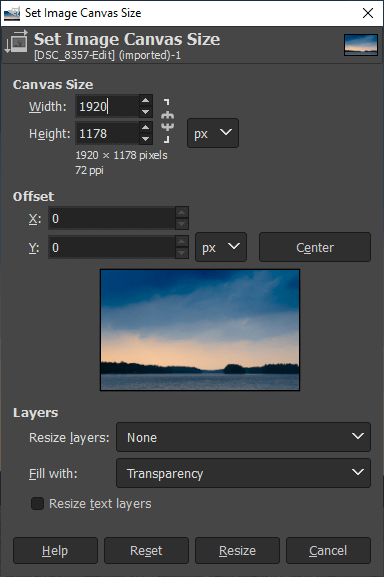
In this case, to create a border 40 pixels wide around the whole image, I'll add 80 pixels to the Width and Elevation sections. The small thumbnail of your image will testify the newly added space, but yous'll run across immediately that GIMP has simply added infinite on the right and along the bottom.
To create your new space evenly effectually the entire image, click the Center button in the Offset section, and GIMP will align everything properly for you.
If you're a fan of the framing style that adds a bit of actress weight along the bottom edge, now's your chance to add together a chip of extra space in the Offset Y section. Don't forget to increase the height a little scrap more to create even spacing at the top to friction match the left and correct sides!
When you're satisfied with the placement, it's fourth dimension to accept a await at the Layers department. My preference is to make full the new space with transparency because then you tin can place another layer below to fill in the border and keep your border and prototype contents on separate layers.

But if you're in a hurry, you can set it to fill the infinite with the foreground or background colors, or fifty-fifty with a pattern. If you lot're really prepare on using patterns, though, I'd recommend using Method three (or a combination of Method 2 and Method 3).
If you lot do, make sure to change the Resize Layers option to All Layers.
Method 3: Brand a Edge with Selections
This is arguably the quickest method to create a more decorative border around your image, although y'all can combine it with Method 2 to avoid overlapping any of your prototype edges if you desire to.
It's ridiculously simple: open your paradigm in GIMP, and printing Ctrl + A to select the unabridged prototype. You can too open the Select carte and cull All.
Side by side, open the Edit card and cull Stroke Selection. This will permit you to employ a stroke around the edges of your selection, and because GIMP uses the pick marquee every bit the halfway point for the stroke, you tin can simply enter a line weight setting that is twice the size of your desired border, and you'll get the results you want.
Y'all tin can fifty-fifty tell GIMP to apply a blueprint along the stroke instead of a solid color or dashed line. If you lot want to add some seasonal snowflakes, falling leaves, or rain of porcupines (depending on the look y'all're going for), now's the perfect chance.
I've just got GIMP's built-in patterns because I am not a big fan of the pattern arrangement, only I've got a guide about creating custom patterns in GIMP here if you want to experiment.

If you're not happy allowing your border stroke to extend across the canvas, you tin can adjust the verbal borders of the selection area using the commands plant in the Select menu.
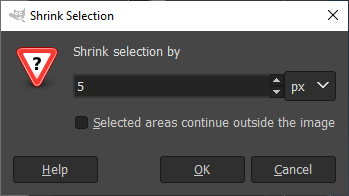
The Compress control is well-nigh useful in this case since it allows you to contract the size of a selection evenly in all directions. Applying the Shrink control with a setting of half your desired border width in pixels will let yous avoid overlaps.
If you want, yous tin can fifty-fifty utilise the selection method to create a border anywhere in the image that yous want – information technology doesn't merely have to be around the edges of your image!
Happy editing!

How To Add Border To Image In Gimp,
Source: https://thegimptutorials.com/how-to-make-border/
Posted by: scottuporthe.blogspot.com
0 Response to "How To Add Border To Image In Gimp"
Post a Comment